

Three fun DIY’s for your Valentines Gift!
Instead of gifting a store bought gift and buying into the consumerist madness you could make a nice gift for your special person. As you might have already experienced, receiving a handmade gift feels extra thoughtful especially if it is beautiful!
Since we at Zurich Art Club stand for Creativity and Community we felt obliged to share with you- our community- great ways to be creative! If you want to gift an experience we absolutely would love to welcome you at our studio in Zurich for a pottery workshop or an art workshop and as always if you need some help deciding, reach out ! However this blog post is about being able to make something at home so lets dive in!
I Love You Pocket square
What you need:
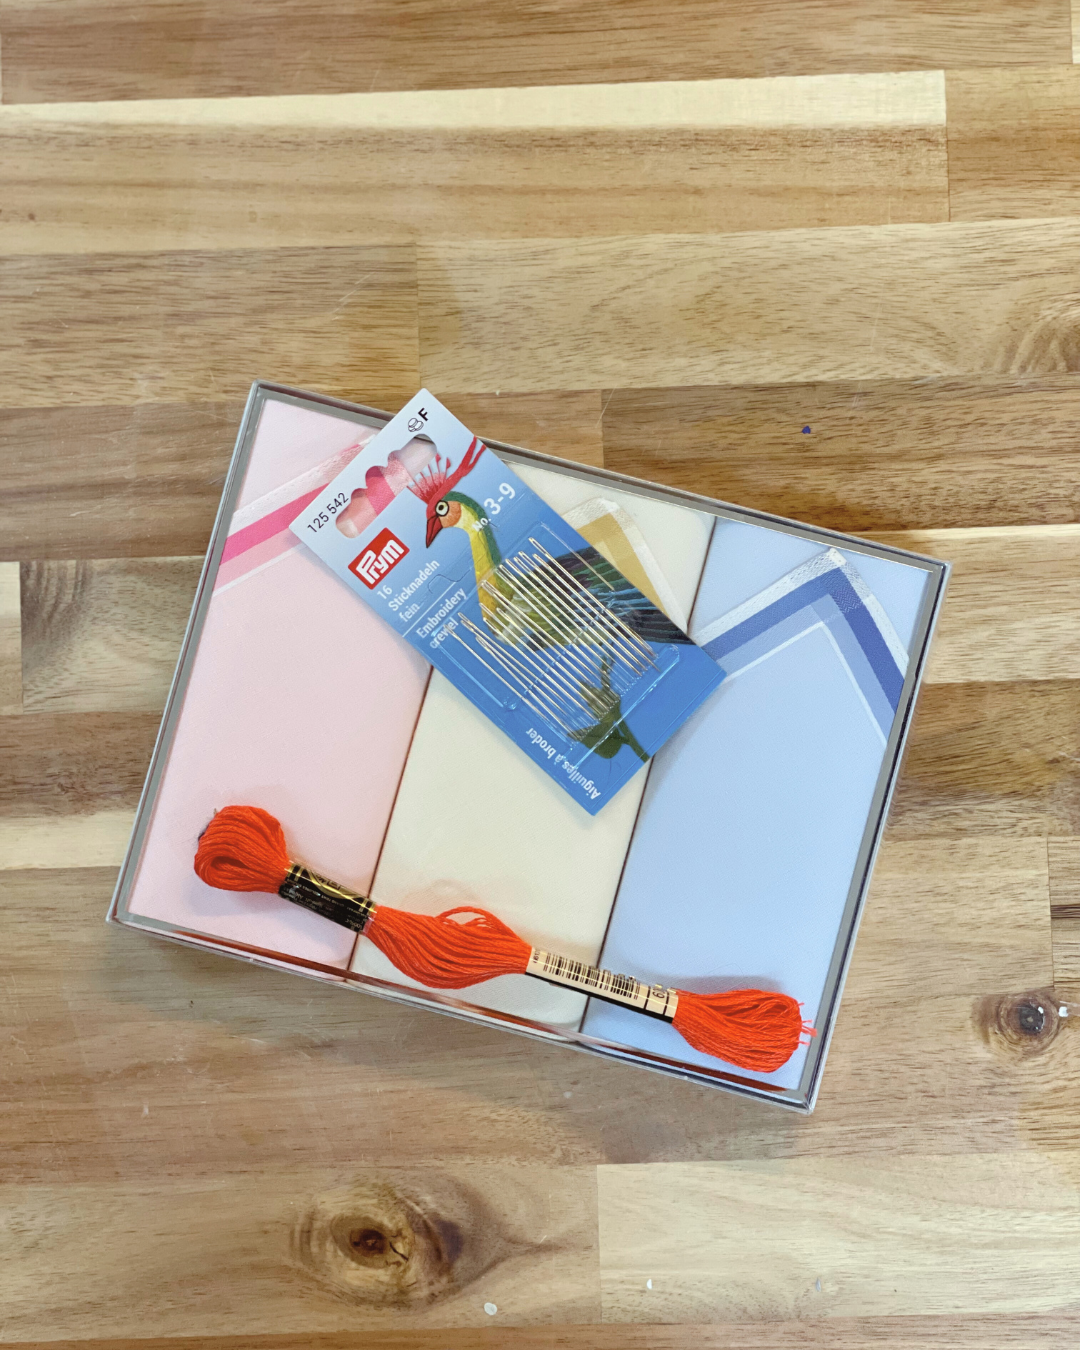
All bought at Coop City St.Annahof, Zurich
A Pocket square
Embroidery Thread
Scissors
Embroidery Needle
You can do this with anything made out of fabric, if you don’t like the idea of a pocket square you can always use a napkin, a cap or a scarf- be creative ! ;)
Step One
Draw your message on your chosen piece of fabric, make sure to use a pencil similar in colour to the thread you have chosen. This will avoid it being visible once embroidered.

Embroidered “I Love You” Napkin
A close-up of a hand-embroidered Valentine’s Day napkin, showcasing a simple yet meaningful DIY “I love you” stitch in bright orange thread.
Step Two
Start by cutting a piece of thread, threading it into the needle and making a knot at the end of the thread. Use a Backstitch to make a nice line and follow the outlines you have pre written.

“I Love You” Embroidered Napkin – Step Two
Step two of a DIY Valentine’s embroidery project: adding “I love you” in red thread to a blue napkin for a personal, heartfelt gift.
Step Three
That’s it ! If you fancy, why not wrap it nicely, for example with some big collage?

Finalised “I Love You” Embroidered Napkin
The last step of a DIY embroidered napkin project, showcasing a handmade “I love you” stitch—an ideal, thoughtful Valentine’s Day present.
Personalised Key Ring
What you need:

Everything was bought at Jumbo, Zurich
Key rings with chain
Small jewelry ring
Fimo
Cookie Cutter
Rolling pin
Cling Film
Step One
Make sure your work surface and your hands are clean. Take out your Fimo from the packaging and start rolling it out. If you own guides use them otherwise make sure you don’t make your Fimo too thin.

Rolling Pins Ready for DIY Keyring Project
Step one of a DIY keyring project: rolling out Fimo clay using a wooden rolling pin and guides for an even surface.
Step Two
If you chose one colour you can go straight to Step 3. If you have multiple colours now is the moment to make them look like marble. Choose your base colour and rip up little pieces of the other colour. Press one into each other, form a coil or ball and mix it through. Once you are happy with this, roll it out again. You can repeat this process until you are satisfied with the outcome.

Marbled Fimo Clay Ball – DIY Keyring Step Two
Step two of the DIY keyring project: blending and shaping Fimo clay into a marbled ball before rolling it out for cutting.
Step 3
Use some cling film to cover your Fimo before you use your chosen cookie cutter. This will make the edges of your piece round and clean but don’t worry if you don’t have any cling film handy. Don’t forget to make big enough holes at this stage for the ring to pass through.


Step 4
Bake your Fimo at 115° Celcius in an oven for 30 min.

Fimo Charms Ready for Baking – DIY Keyring Step Four
Step four of the DIY keyring project: marbled Fimo charms, including hearts and letters, laid out on a baking sheet before hardening.
Step 5
Once hardened and cooled down you can start with the assembly of your pieces. Use the smaller ring to attach your charm with the key ring.


Moving on up from Fimo to Clay? Take a look at our Ceramic Hand-building Courses we know you’ll love it!
A personal Valentines Newspaper
What you need:

Internet
Printer
Step One
Find our template on Canva here.
Step two
Personalise each box, change the photos and write your own text.
Step 3
You can either send it digitally or if you fancy why not get it printed on nice paper ?

That is it! Simple and easy projects that we decided to test out for you; however we are sure you can find plenty more creative mini projects that you can achieve at home or if you are missing equipment you can come during our Open Studio Session to access our facilities. If you would like to know more about our top three workshop picks for date night you can learn more about that on our instagram.
Want even more creativity for you and your partner? Why not Book a course at the Zurich Art Club.
We cant wait to meet you!